


The thing about buying an old, small house is that they are old and small. That means dealing with awkward layouts, lights in weird places, a lack of closets, and electrical outlets that are always in the wrong place, or not there at all.
Since I’m planning on renovating basically every square inch of my 87-year-old 1,000 square foot home, I didn’t look at these drawbacks as insurmountable obstacles. Instead, they’re just more items on my long, long to-do list. In most cases, I can fix the issues like electrical outlet and light placement by simply having a pro move them, but the cramped quarters and awkward layouts sometimes require a custom solution.
Cramped Quarters and Awkward Layouts
That was the case with my living room. The living room is a long rectangular space that opens on one side to the dining room and the rest of the house. Figuring out where to orient the furniture has been tough, but I finally settled on nesting the television in a small 30 inch by 24 inch alcove on one side of the room. Here’s a quick sketch to show you what I mean:

The alcove is tiny, too tiny for modern day large televisions, especially the 50-inch LG I scooped up at a deep discount on Black Friday. While I solved the issue of the television being too large by mounting it in the corner using this Kanto M300 Single Stud TV Mount, that still left the issue of the finding a 30-inch wide television stand to house our gaming consoles and video games.
You see, as far as I can tell from my research, 30-inch wide television stands do not exist in nature. Most stands are either in the 46 inches wide range or the 21 inches wide range. Neither of those would work for this little corner.
So I decided to make one myself.
Materials for a DIY Entertainment Center
Inspired by the many fauxdenza tutorials out there, I decided to make a modified version for the TV stand. The premise of the fauxdenza is to use the inexpensive and highly customizable IKEA wall cabinet, trim it out with wood, add handles and mount it to the wall for a low-profile storage solution.
I adapted this design by choosing this two drawer Sketon wall cabinet with Veddinge White doors. Measuring 30 x 15 x 20, this wall cabinet was the perfect width yet still deep enough to accommodate my gaming consoles. After assembling the wall cabinet I measured the sides and top for the trim and headed off to home depot.
To trim out my DIY entertainment center I picked up a piece of pine shop shelving from Home Depot. I like this shop shelving because it comes pre-sanded and is wide enough to cover the entire cabinet without needing to join multiple pieces of wood together. I’m not at that point in my carpentry skills.
While at Home Depot I asked them to cut the board down into three pieces, two for the sides and one for the top. Since the board is 3/4 inches thick I added 1.5 inches to the length of the top piece to account for the overhang. I also made sure to measure the depth of the cabinet including the drawers so they wouldn’t protrude.
I also picked up the following items from Home Depot:
- Mid-century style furniture legs and straight mounting hardware
- A small can of Minwax Special Walnut stain
- A large can of Minwax Water-Based Polycrylic in a Satin finish
- Two foam brushes
- Lintless paper towels
- Medium and high-grit sandpaper
- 1 inch wood screws
- Gorilla Glue
- 2 handles for the drawers
Assembling and Staining My DIY Entertainment Center


Once I got the wood pieces home the first thing I did was a dry fit on my already assembled cabinet. I did this to make sure I’d measured correctly before going through all of the effort to sand and stain the wood pieces. Fortunately, everything fit!
The wood came pre-sanded, which is great because I don’t yet have a sander, but it still needed a little work so I selected the best side of each board and went over them with the medium and then high grit sandpaper by hand, making sure to wipe everything down with a damp paper towel between sessions to remove the dust. I also vacuumed each board with the duster attachment on my Dyson when I was done to make sure no dust was hiding in the knots.
Once the sanding was completed, it was time for stain. Using the Minwax Special Walnut stain and a foam brush I wiped a very, very light coat of stain onto each piece of wood. I didn’t want it to be too thick because that causes bubbles (in fact, you can see some bubbles in the picture below).

It’s important to let the stain sit for a few minutes before wiping off the excess with a paper towel. I decided to only do one coat of stain on this wood, so I let it dry overnight in the basement.

Sidebar: Having a basement to work in is kind of amazing, especially for projects like this that are a wee bit fumey.
Polying
Once the stain was dried I lightly sanded it with high grit sandpaper to soften it up and wiped it down with paper towel again. Then it was time to Poly. I selected water-based Poly because oil-based can give the wood a yellowish tinge. Again, I used my foam brush to apply a thin coat and was careful not to over brush which can cause brush strokes. Dry, sand, wipe, repeat for two additional coats. I applied the same treatment to the unfinished furniture legs.
So far the project was smooth sailing and I was doing mostly stuff I’ve done before when I DIYed my bed frame. Once the boards were dry it was time to attach them to the cabinet. For this part of the project I needed the following tools (which I had on hand):
- Power drill
- Drill bits
- Level
- Painter’s tape
- Measuring tape
I moved the whole shebang upstairs to level flooring (the basement has carpet), where I attached the boards to the cabinet with glue. I used ratchet straps on the side and books on top to weight the wood against the cabinet.
After letting it cure for a few days it was time to make everything super secure with one-inch wood screws. First, I drilled pilot holes in the cabinet and the wood to decrease the chance of splitting, and then I drilled one-inch wood screws from the inside of the cabinet. The wood was pretty solidly attached to the cabinet because of the glue.
Furniture Legs and Cabinet Pulls
After the cabinet and trim were solidly once piece, I flipped it over and used my power drill to attach the furniture legs.
After that, the last step was to install the handles, which meant drilling into the cabinet doors. I used painters tape in an x-marks-the-spot configuration to minimize any potential scratching or splitting.
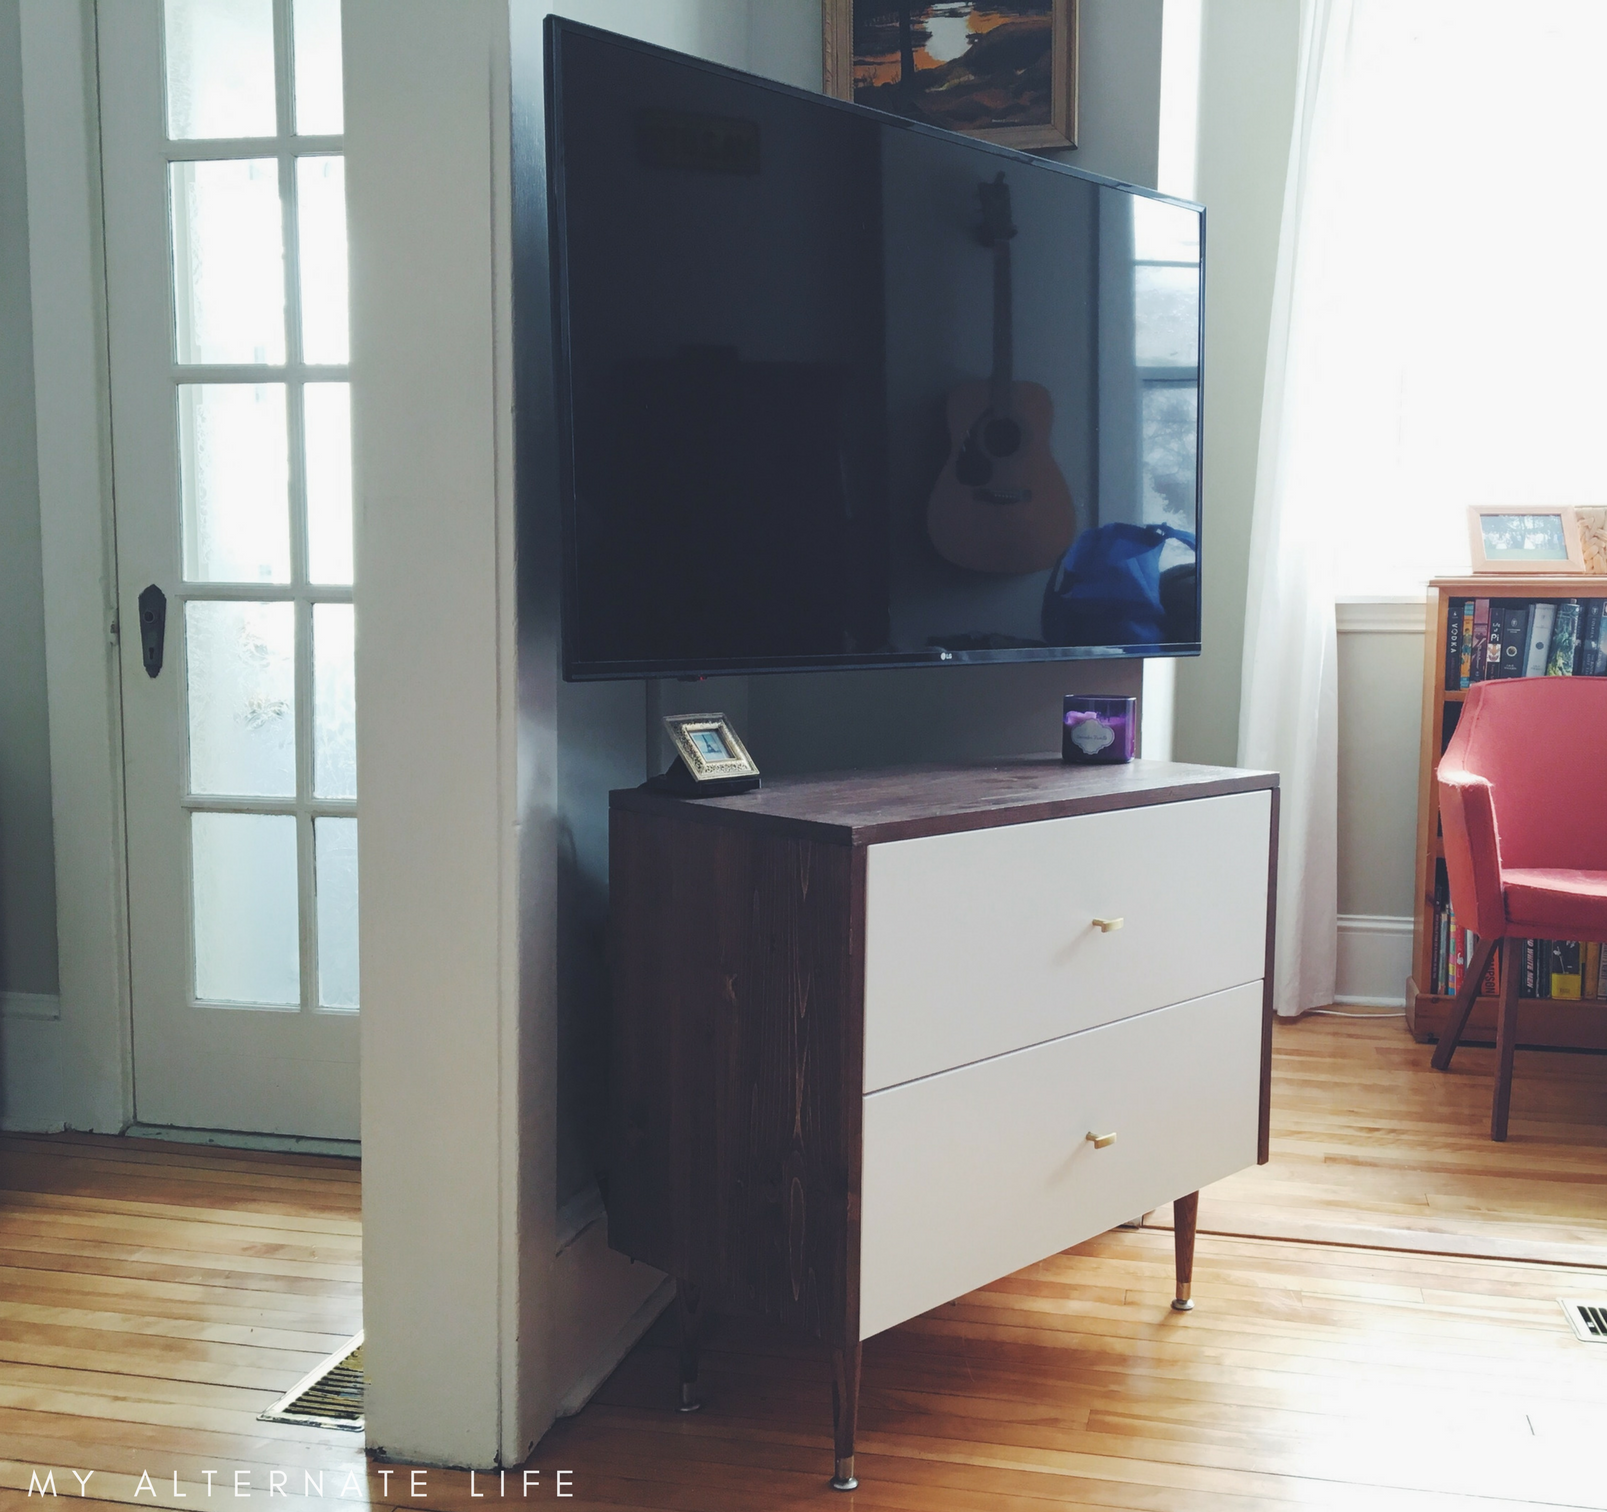
Et voila! I had a perfectly sized, mid-century modern inspired DIY entertainment center. I can’t tell you how nervous I was when I finally slid it into place, but my nervousness was for nothing – it fit perfectly. After dealing with my former television stand that had been too long and was jutting into the room and making that whole space feel tight and awkward, this new stand fit like a dream and made the whole room feel more open.


The Cost of My DIY Entertainment Center
This was a pretty straightforward project, but I didn’t have any of the supplies on hand, so I was starting from scratch and had to buy everything. Fortunately, I kept my receipts. All in all the project cost us:
- Ikea Cabinet: $233
- Home Depot Supplies: $112
- Total: $345
I consider this a pretty good price for a DIY entertainment center, especially since I didn’t use 100% of the supplies which means when I build a matching fauxdenza in the dining room, the cost will be even more competitive.
Customization
After using it for a few weeks I made a few adjustments to truly customize it to my needs:
Within the cabinet, I added an Utrusta shelf for the consoles to sit on, and a Signum cable management system in the back to get the millions of cables off the ground. I also drilled holes in the back panel so the electronics could have some ventilation. Finally, I hid the cables running to the TV using this Legrand Wiremold Flat TV Cord Cover Kit and painted it the same colour as the wall (Benjamin Moore’s Hazy Skies, which I had on hand). The total cost of these items was about $75.
Now time to strip the fireplace back to its original brick!

Comments